So, you’re thinking about adding some vibrant color and effortless charm to your San Antonio garden? Look no further than daylily bulbs! These hardy perennials are a fantastic choice for our unique climate, offering a dazzling display of blooms with minimal fuss. Let’s dive into the world of daylilies and unlock the secrets to growing them successfully in your own backyard oasis.

Daylily 101: What to Expect from Daylily Bulbs
First things first, let’s clarify some terminology. While often referred to as “daylily bulbs”, these plants actually grow from fleshy roots or fans, not true bulbs. These fans emerge from a central point, and you’ll often see them sold bare-root or in pots. In bloom, Daylilies show off trumpet-shaped flowers that typically last only a day (hence the name!), but each plant produces many buds, providing weeks of continuous color.
Average Mature Growth:
Daylilies vary in size, but most varieties reach a height of 1-3 feet and a width of 1-2 feet. Be sure to check the specific mature size of the variety you choose to ensure it fits well in your garden space.
Daylily Appearance Before Blooms:
- Clumps of strappy, arching green leaves
- Resemble ornamental grasses when not flowering
- Bare root fans with tan or brown roots and short green shoots
Daylily Appearance During Blooms:
- Tall flower stalks (scapes) emerge from the foliage.
- Each stalk bears multiple buds.
- Flowers come in a wide array of colors, shapes, and sizes (from delicate pastels to bold, vibrant hues).

4 Care Requirements for Growing Daylily Bulbs Successfully
1. Sun Exposure:
- Daylilies thrive in at least 6 hours of direct sunlight daily.
- Morning sun is ideal, as it helps dry the foliage and reduce the risk of fungal diseases.
- In the scorching San Antonio summers, some afternoon shade can be beneficial, especially for varieties with darker blooms.
2. Soil Type:
- Well-draining soil is crucial to prevent root rot.
- Amend heavy clay soil with compost, expanded shale, or other organic matter to improve drainage.
- A slightly acidic to neutral soil (6.0 -7.0) is ideal. The addition of peat moss or soil conditioner can help.
3. Water Usage:
- Water deeply and regularly, especially during hot, dry periods.
- Aim for about 1 inch of water per week, either from rainfall or irrigation.
- Avoid overhead watering, as it can promote fungal diseases.
- Mulch around the plants to help retain moisture and suppress weeds.
4. Fertilization:
- Fertilize in early spring as new growth emerges and again after the first flush of blooms.
- Use a balanced fertilizer (10:10:10), or a fertilizer specifically formulated for flowering bulbs, like Espoma Bulb-Tone (3:5:3).
- Avoid over-fertilizing as it can lead to excessive foliage growth at the expense of flowers.
- Always follow fertilizer label.
- Always follow fertilizer with a good watering.

San Antonio’s Top Daylily Varieties
Here are a few daylily varieties that are particularly well-suited to the San Antonio climate:
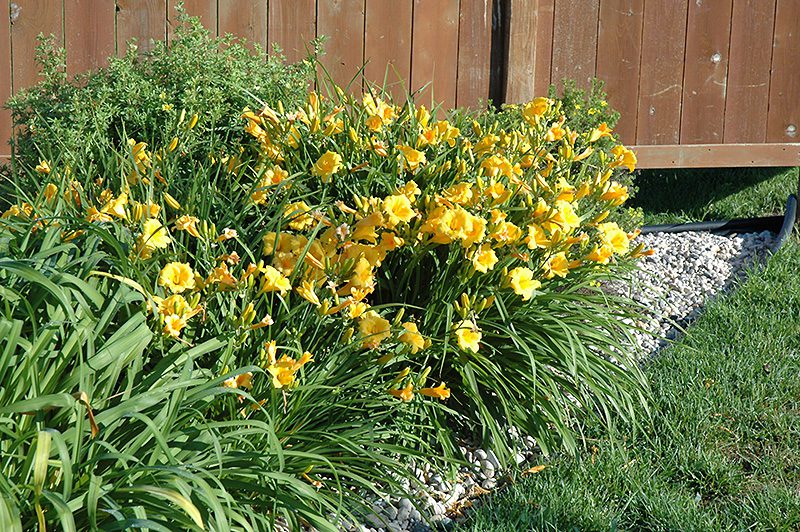
- Stella de Oro’: A classic dwarf variety with golden-yellow blooms that flowers repeatedly throughout the season.
- ‘Happy Returns’: Another reliable rebloomer with cheerful lemon-yellow flowers.
- ‘Storm Shelter’: A fragrant daylily bulbs with mauve colored blossoms with an enormous deep eggplant purple eye and matching eggplant purple petal edge from Proven Winners®.
You can look for these varieties and a whole lot more at either of our Rainbow Gardens locations.
Dividing Daylily Bulbs and Winter Care:
Dividing Daylily Bulbs:
- Divide your daylily bulbs every 3-5 years to prevent overcrowding and maintain vigor.
- The best time to divide is in early spring or fall.
- Dig up the entire clump and gently separate the fans, ensuring each division has healthy roots and foliage.
- Replant the divisions in prepared soil, spacing them about 18-24 inches apart.
Winter Care:
- Daylilies are generally quite cold-hardy and don’t require extensive winter protection in San Antonio.
- After the foliage has died back in late fall or winter, you can cut it back to ground level to tidy up the plants.
- Apply a layer of mulch around the base of the plants to help protect the roots from temperature fluctuations.