Welcome to the second installment in our Seed Starting blog series. Today we’ll be discussing how to put those seed starting supplies to use. If you need a list of the supplies, see Part 1: Seed Starting blog here. Starting seeds indoors is a fun and rewarding gardening activity. Here are some tips for seed starting success.
6 Easy Steps for Successful Seed Starting
1. Prepare seed trays/containers: Choose a quality, lightweight potting mix like Espoma Seed Starting mix. Start with moist soil. To avoid the mess of soil spilling over seed pots as you water them, wet soil mix thoroughly in a separate container, let it drain completely, then fill up seed starting pots. Be sure to allow excess water to drain so you aren’t planting in soaking wet soil.
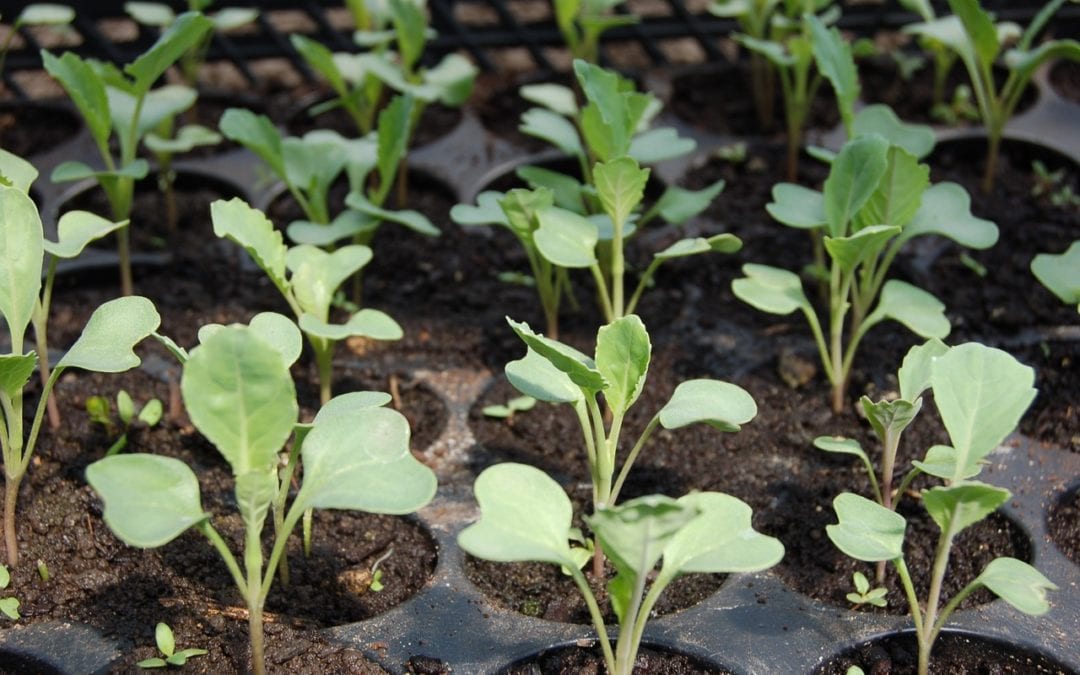
2. Plant seeds and label: In smaller containers, plant only 1 or 2 seeds in each cell. In larger containers, you could try 3 or 4 seeds, thinning the weaker seedlings out later on. Press seeds into the soil surface, ensuring you have good contact with the soil. Don’t tunnel or poke the seed all the way down. Leave some room for roots to grow, but make sure the seed is pressed into the surface and covered with a thin layer of soil. Before moving on to the next seed variety, place your label stick into the container along the side. It can get quickly get confusing and no one wants that gift of a mild jalapeno that actually turns out to be a ghost pepper! Label as you go.

- Extra Tip #1 Certain seeds, like lettuce, actually need light to germinate. Be sure to read your seed packets for info on exactly how deep to set your seeds.
- Extra Tip #2: Certain veggie seeds (as well as some flowering seeds) benefit from a 12 – 24 hour soak in warm water before planting to germinate successfully. These include: corn, asparagus, carrots, beans, okra, pumpkins, squash, parsley, and peas. It’s not mandatory, but they may take longer to germinate without the soak.
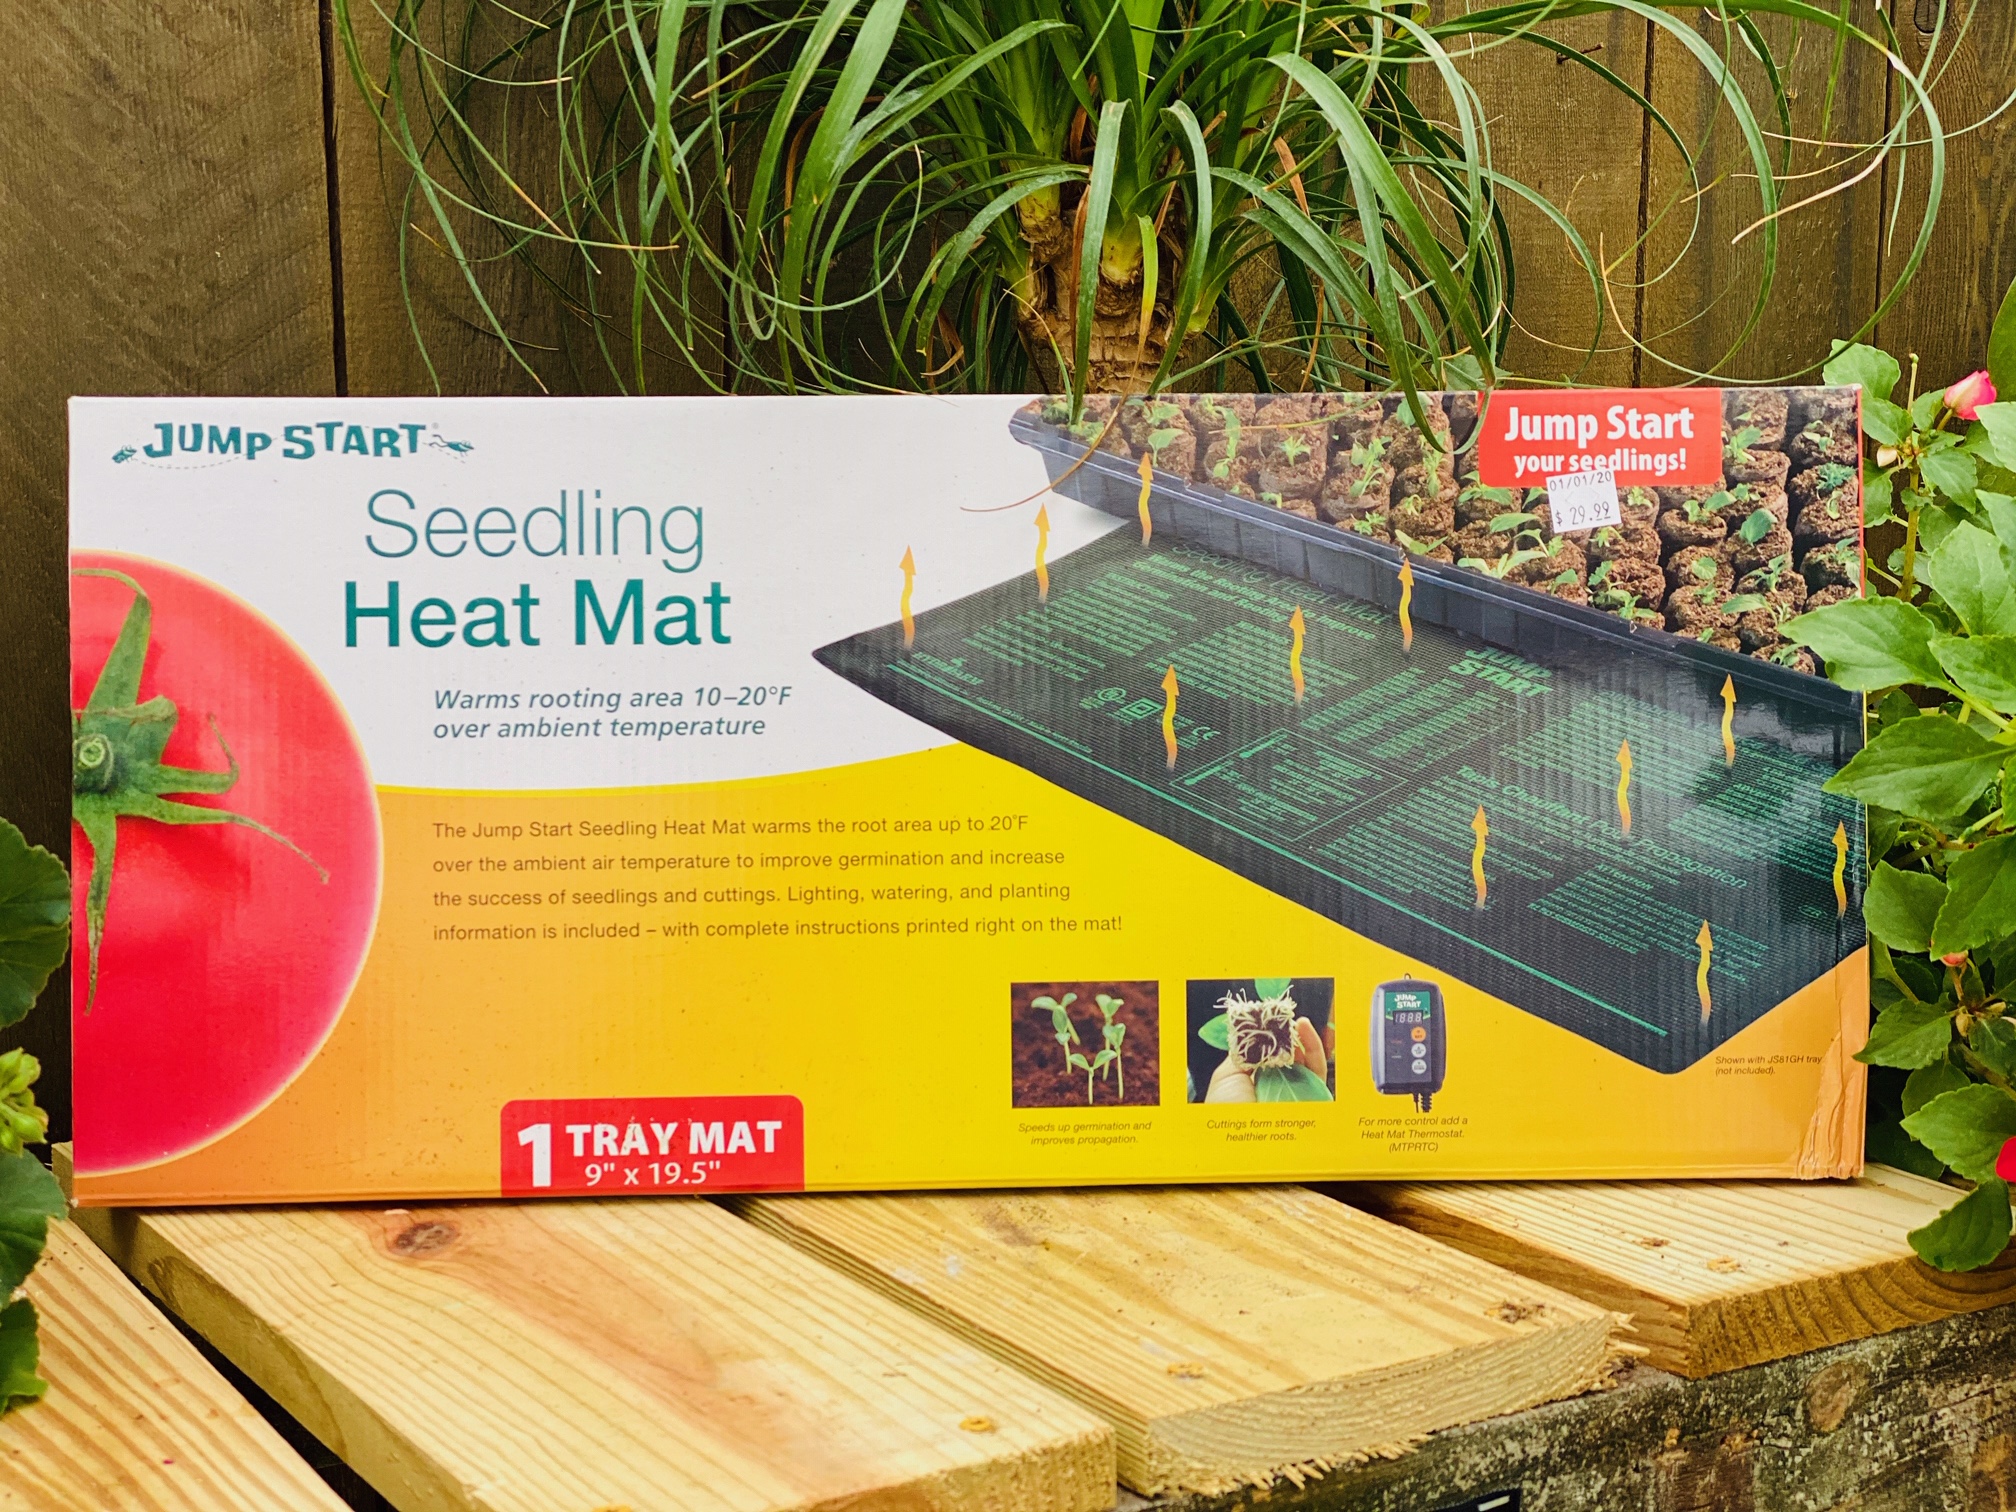
3. Cover seeds and keep warm: Cover up trays or containers with clear plastic. If you create an airtight seal you won’t need to water your seeds again until after they have sprouted. Leave space between the plastic and soil. A heat mat is ideal for getting those seeds sprouting. You plug it in and it warms the soil through the bottom of the tray, but a warm laundry room or top of refrigerator can be a good spot for your seed trays too. Most seeds need warmth to germinate, and then light after germination (some need light from the get go so, again, check your seed packets). See our DIY tip for jumpstarting germination here.
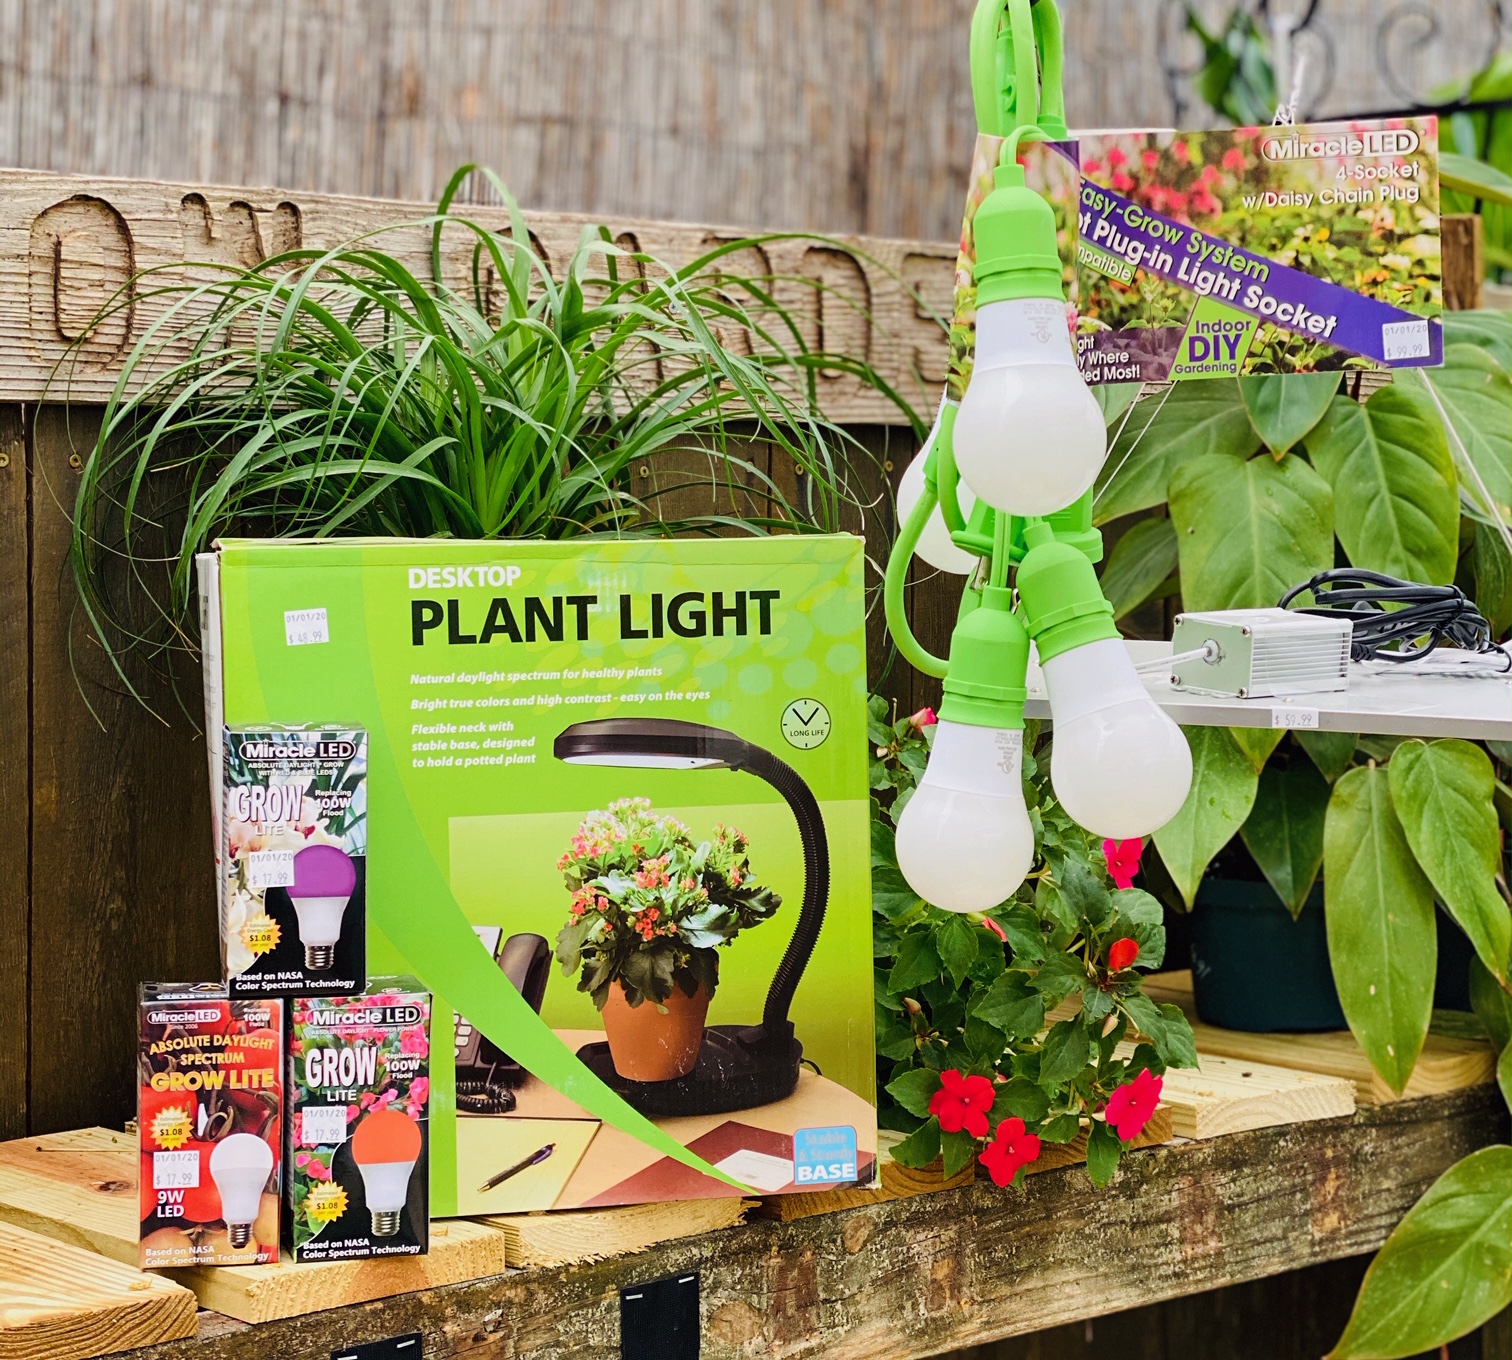
4. Let there be light: When your seeds germinate (about 2 weeks), open and prop up your plastic covering for a couple of days to let air circulate, then remove it completely. Your seedlings now need light to create chlorophyll. If you don’t have a sufficient bright, sunny window with indirect light, Professional grow lights are an amazing tool. With grow lights you can pretty much grow your seedlings anywhere in your house! Check out this featured picture with a desktop grow light! If you keep your seeds by the windows, rotate trays every few days to get even sun exposure on all sides of your seedlings.
5. Thin seedlings: If you’ve planted multiple seeds in one container, thin out weaker seedlings so the stronger seedling will have room to grow its roots sufficiently. A thin pair of pointed scissors can snip the weak seedlings away under the soil without you needing to pull up the plant and disturbing the roots of the seedling you want to keep.
6. Watering and Feeding: Seedlings need to be kept evenly moist. Spray bottles work great to mist your plants. Feel your soil frequently. Don’t let the soil dry out, but stay clear of overwatering as well. In about a month, you can give your seedlings a boost of nutrition with a soluble fertilizer like ‘Grow Big’ from FoxFarm, encouraging lush, vegetative growth, which is perfect for new transplants.
And that’s pretty much the process of starting seeds indoors. On January 20th you can continue on at this link for our 3rd installment in our Starting Seeds blog series and find out what to do once your transplants are ready for the garden.

You’re on your way to a self made garden. Happy planting!
~The Happy Gardener, Lisa Mulroy
Trackbacks/Pingbacks