In keeping with our plan to share our guest speakers’ key notes from our classes and events, today’s blog is a recap of our Tomato Class we recently had, featuring Keith Amelung, our local heirloom tomato supplier. Keith gave us a ton of information to help grow tomatoes successfully. Here is our tomato shopping list based on product recommendations from Keith, today I will outline some key points based on his tomato advice below. Let’s grow some tomatoes!
Choosing Tomatoes for the San Antonio Area
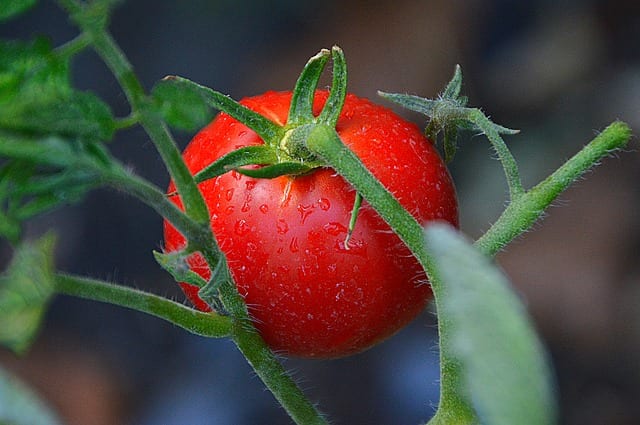
Smaller types of tomatoes do better in our San Antonio climate, 6 oz. or less. They are more reliable in terms of fruit production. Smaller tomatoes can sometimes bear fruit in 55-60 days, while larger sized tomatoes take longer to fruit and mature, sometimes 85 – 90 days or longer. Generally, by the time they get ready to produce, the heat of summer has arrived and fruit just won’t set in the heat. (If you really just have to have a large type of tomato, the work around is planting tomatoes as early as you can, but the problem with this is the threat of a freeze, and honestly the availability of the plants.)
Smaller tomatoes have a higher sugar content. Types of smaller tomatoes that do best here consist of plum, cherry, and paste tomatoes. It’s a great idea to plant a variety of tomatoes so that you really get to know which are your favorite. Red is not the only color available. You can also find orange, pink, blush, green, purple, black, brown, striped, etc… treat your palette to something new!

When to Plant Tomatoes in San Antonio
Tomatoes arrive at the nursery earlier than the time that they should be planted outside. You should still buy your tomatoes for the opportunity to get the selections you desire. Buy and then bump up the nursery transplants to a larger sized container and allow them to continue to grow in a protected area until it’s time to put them in the garden.
The best time to plant tomatoes outside is when the danger of a freeze has passed. We don’t have a specific date, but can offer a general timeline. Our average last spring frost is around mid March. That is generally a safe time to plant your tomatoes outside, but be ready to protect them if a late freeze arrives.
Keep that frost cloth handy. It also works wonders to protect young tomatoes from damaging spring winds that can stop growth. Just wrap it around the cage about 3’- 4’ high from the bottom up and it protects your tomato from the wind but still allow it to receive necessary sunlight.

Tips for Growing Tomatoes Successfully
Sun: Tomatoes need full sun, 8 hours at least. These full sun hours do not need to be consecutive, but they really need the sunshine to thrive. (The exception is larger tomatoes that suffer greatly in summertime. Keith’s tip is to plant beans on teepee poles over the plant to shade it slightly from the hottest afternoon sun.)
Water: Tomatoes do need water, but do not need to be overwatered. New plants may need to be watered daily, but you still need to allow some time for the drying out process. Established plants prefer deep, thorough, but inconsistent drinks, just like Mother Nature would ideally offer. An hour or two on a drip system once a week is perfect.
Soil: Deep soil is needed for the deep roots, 15” – 18” minimum, more is better. Container grown tomatoes need space too. A 15 gallon – 20 gallon sized will house ONE indeterminate type of tomato plant (2 smaller sized plants, like San Marzanos could possibly fit). You should also plant your tomatoes deep, planting up to the first set of leaves on the stem. Feeder roots will develop all along that buried stem, and increase the strength of the plant.
- When it comes to purchasing soils, you basically get what you pay for. Quality soil is not cheap, but it is essential for growing healthy, productive plants. Look at your soil ingredients. Try to choose products with active soil microbes, mychorrhizal fungi, and things like bat guano, earthworm castings, etc…These are also ingredients you can purchase separately, but companies like FoxFarm include them, so their soil products are a good place to start.
Compost: Compost is a great way to easily “feed” your soil and it is essential for the health of your plants. 3’ of compost should be worked into your garden beds EVERY growing season. Ever notice how your garden beds seem to shrink, or settle, throughout the year? That is due to the organic materials breaking down and converting into nutrients for the plants to easily take up, but it needs to be replenished each season.
Rock Phosphate, Soil Amendments, and Mychorrhizal Innoculants: Keith recommends putting a big handful of rock phosphate into the planting hole and sticking your tomato right into it. The powder strengthens the roots and blooms and toughens up your plant.
- Lava sand mixed into the soil helps pull moisture and trap fertilizer, keeping more of what your plant needs in the soil. Adding expanded shale to your soil can help to open up clay platelets if you have that type of soil.
- Mycorrhizal Inoculants in the soil form a kind of symbiotic relationship with the fine root hairs on your tomato plants. Plants benefit from increased ability to cope with stress, such as subpar soil pH levels.
Mulch: Mulch keeps weeds at bay, retains soil moisture, regulates soil temperature, prevents soil borne disease from splashing up on your foliage when watering, and if you choose an organic one it will eventually break down and help feed and increase the quality of your soil.
Fertilizer: Tomatoes are heavy feeders. We think all natural is best because it improves your soil for a better environment for plants. There are many choices, but FoxFarm, Espoma, Medina, and Rose Glo are all great brands to try. Dry fertilizers are slow release so you usually use them around every 3- 4 weeks, but read the label and apply accordingly.
- You can mix granular fertilizer into the soil at planting and offer a boost of liquid fertilizer too. Liquid fertilizer feeds immediately. For the 1st and 2nd month offer a liquid fertilizer higher in nitrogen and then switch over to one higher in phosphorus when blooms begin.
- Other ways to feed are adding handfuls of earthworm castings (wonderful) around the base of the plant, compost, bat guano, forest humus, etc… All those natural soil feeders are beneficial.

Preventing Pests and Disease on Tomatoes
Yes, you could choose a pesticide or fungicide to battle pests and disease on tomatoes, but you may also be harming the local pollinators in the process. Keith (and we) prefer to use natural products to prevent these things from happening in the first place. Strong, healthy plants, offered the items listed above tend to have less issues.
Fungus: Horticultural Cornmeal can be used as an antifungal product. You can: dust it over the surface of the soil or add a handful to the planting hole. You can also make an antifungal tea by adding two cups to a gallon of water, mix, and then strain it, so you can use it in a pump sprayer. Use weekly or as needed to ward off fungus. Choose disease resistant varieties of tomatoes for your best shot at not developing leaf blight, mosaic virus, etc…
- Keith’s Extra Tip: Keith is a big fan of doing what he calls the “stinky fish dance”. He says to make 2 gallons of a “juice” that consists of Fish Emulsion/Seaweed/Molasses and put it in a pump up sprayer that will allow you to easily spray the undersides of leaves. AT NIGHT, there are spores that open up on the undersides of leaves for a period of time. Every 2 weeks or so, go out and offer this quick systemic foliar spray to prevent a multitude of diseases.
Pests: Observation is your best prevention tool.
- Tomato hornworms are prevalent pests. They feed at night, so take trips out to the garden at night. (Fun Fact: Hornworms will glow under a blacklight.) You can pluck these off and drown them in soapy water, or you can spray with Bt (just be careful because Bt will kill all caterpillars, even butterflies.)
- Leaf footed bugs are a pain too! If you can get them when they are young it is best because the adults can fly away. Nymphs show up as a cluster of red/orange bugs with black legs. Try spraying them with Dawn dish soap and water, or insecticidal soap.
This is a whole lotta information, but we wanted to give you the opportunity to know all the tips we got from the man who supplies some of our healthiest tomato transplants year after year! Now come get those tomatoes; the time is now!
~ The Happy Gardener, Lisa Mulroy
1. What is the ratio of Dawn liquid to water for spraying bugs?
2. How often can the solution be sprayed?
3. Thanks! Great article….
Hi Barbara,
You can use about 1TBSP of Dawn to a quart of water, or around 4 TBSP per gallon of water.
Once a week for about 4 weeks is a general timeframe (or every 4 days for heavy infestations) Always check your plants for signs of insects. If you don’t have any, don’t spray.
Can you provide the recipe for the “juice” that consists of Fish Emulsion/Seaweed/Molasses please?
Hi Gabriele,
Keith never really gave us a 100% recipe, but we have found that in general, you can 2 parts fish emulison to 1 part molasses and 1 part seaweed. Use about 1- 2 tbsp per gallon of water. Remember to only apply in the cooler evening hours.