Composting
On This Page:
Starting a Compost Pile
t’s easy to create your own compost. To be successful you only need a few items and elements. We’ll talk about each of them on this page so you’ll easily know exactly what you need to start your own compost pile. For those of you who don’t desire to make your own compost, Rainbow Gardens supplies soil conditioners and compost in bagged form at our nurseries for your convenience.
1. Space:
You can purchase a compost bin, make one, or start composting in an area on the ground. A compost bin generally speeds up the compost process a little and can keep animals out of your compost, but they are generally more costly. A DIY compost bin can be as easy a 3 foot circle of fine wire mesh (¼” between wire) that stands 3-4’ high. Or you can make one from recycled pallets. You can also just let your compost pile start right on the ground.
2. Air Circulation:
The best conditions for rapid and thorough composting, allow for air circulation. Start your compost pile with 3” of coarse material like branches and twigs. Air can then circulate from the bottom and up through the compost pile. You also create air circulation when you turn your compost pile, which you will need to do regardless, every two weeks or so. Turn with a pitchfork, shovel, or garden probe, bringing the bottom of the pile to the top, opening air pockets in the process.
3. Carbon and Nitrogen:
The core of your compost is carbon and nitrogen, mostly in plant form. High carbon materials are dried leaves, bark, sawdust, wood chips, etc. High nitrogen/high protein materials are fresh grass clippings, vegetable matter, kitchen waste, and manure. Add these materials to the compost bin, in alternating layers, on top of your coarse layer, to a height of about 6”. When adding manure, just don’t add too much (probably only 10-15%).
4. Water:
Your compost needs water for the breakdown process. The compost should be moist, but not soggy; it should have the feel of a squeezed out sponge. In periods of prolonged rainy days, you may need to cover it with a tarp for a bit, otherwise your compost will get soggy, compacted and difficult to turn.
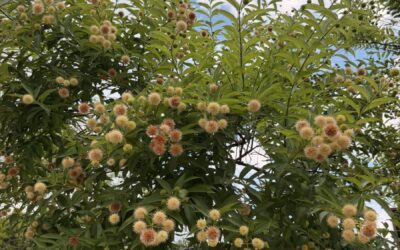
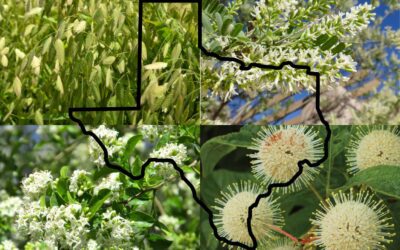
Button Bush: A Native Pollinator Magnet for San Antonio
If you’re looking for a native plant that delivers unique beauty, pollinator power, and wildlife benefits all in one, button bush deserves a spot in your landscape. Native plants often get overlooked in favor of flashy ornamentals, but button bush proves that you...

3 Must-Have Fungus Fighting Products for Your Lawn and Garden
If your lawn suddenly has brown patches, thinning grass, yellowing areas, or strange circular spots, there’s a good chance fungus is beginning to move in. If fungus hasn't arrived yet, with all the rain we've had lately, there's a greater chance of it being right...
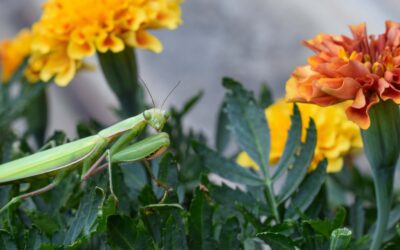
Beneficial Insects: The Tiny Garden Helpers You Actually Want
When most people think of insects in the garden, they picture chewed leaves, swarming pests, and plants under attack. But the truth is, not all bugs are bad. In fact, some insects are essential partners in creating a healthier, more productive landscape, especially...
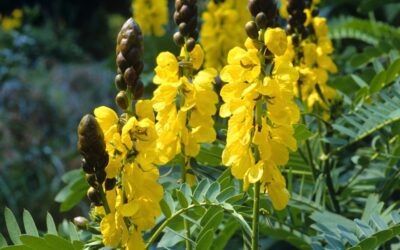
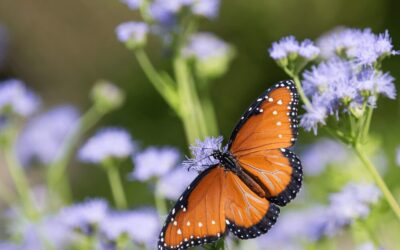
Popcorn Senna: A Fall/Winter Pollinator Plant with Tons of Charm!
Sulphur butterflies are some of the most cheerful looking pollinators out there. The sight of their sunshine-yellow or tangerine-orange wings flitting around your garden brings instant smiles. If you’ve noticed these happy pollinators coming around to see what you...
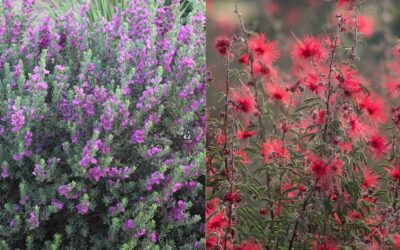
Baby Yoda Texas Sage & Mexicali Rose Fairy Duster: Xeric Stars
Here in San Antonio, we are always looking for plants that can muscle their way through the extreme temperatures of our blazing summers and still look great while doing it. We've been impressed with the performance of two newcomers to this game over the past couple of...

Battle of the Flowers: Hibiscus vs. Bougainvillea
Welcome to the main event! In one corner, we’ve got the bold, tropical showstopper—hibiscus. Big blooms, glossy leaves, and undeniable “vacation vibes.”And in the opposite corner, the sun-loving, drought-tough contender—bougainvillea. Bright, papery color and a...
Why Native Plants Make Sense in San Antonio: 4 Great Options
There’s something special about planting a garden that feels right at home in South Texas. Native plants have spent generations adapting to our heat, our unpredictable rainfall, our stretches of drought, and even those occasional cold snaps that surprise us in winter....
Pollinator Habitats: Why You Need Both Host and Nectar Plants
There’s something magical about stepping into the garden and seeing butterflies fluttering through the lantana, bees humming around the salvias, and hummingbirds zipping from bloom to bloom. But if you really want a pollinator garden that feels alive—not just...
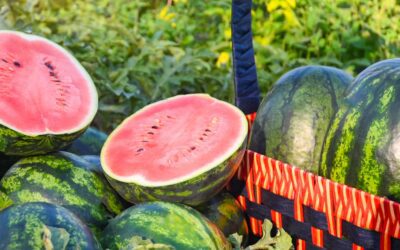
Growing Watermelon in San Antonio, TX: Tips for a Sweet Harvest.
There’s nothing quite like slicing open a homegrown watermelon on a hot San Antonio summer day. Sweet, refreshing, and absolutely worth the garden space, watermelon is one of the most rewarding warm-season crops you can grow. When it comes to growing watermelon...
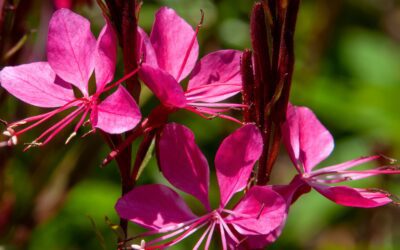
Growing Gaura in Texas: Heat-Loving Bloomer Long-Lasting Color
If you’re looking for a plant that thrives in San Antonio’s heat and keeps blooming for months, gaura is one of the best additions you can make to your garden. Also known as beeblossom or whirling butterflies, gaura produces delicate white or pink flowers that seem to...
Vermiculture: Worm Composting
Basic Requirements
A shallow container – about 12″ deep, with a cover to keep it dark inside the bin.
A controlled temperature – the temperature of the bedding material should not exceed 84º F. The optimum temperature range is 55-77º F.
Moisture – worms need water to keep their skin moist, but not so much that they drown
Ventilation – worms need air to breath. There are also other little organisms that are at work breaking down the organic material placed in the bin. These organisms need air. If there is not enough oxygen, the worms and other helpful organisms will die. Microorganisms that do not need air will move in, rotting the material in the bin and giving off unpleasant smelling gases as a byproduct.
Food – our trash is their treasure. Fruit, grains, vegetables, egg shells, coffee grounds, and tea bags are all fine. Avoid meat, fish, milk, fats and oils, and pet droppings.
How many worms will I need?
The first step to setting up a healthy worm bin is to determine how much organic matter will be added each week. (This may require some weighing until you feel comfortable estimating amounts.) Divide the amount discarded by seven to determine the average amount of daily waste. The recommended “worm to garbage” ratio is 2:1. So for each 1/2 pound of kitchen waste you should have 1 pound of worms.
What size worm bin do I need?
Again we return to the amount of waste produced each week. The minimum recommended amount of space is 1 square foot of surface for each pound of garbage. As an ex- ample:
If your household produces 6 pounds of waste per week, a good size for your bin would be 2′ x 3′ x 1′. Hint: It might be helpful to start with this size bin, restricting the amount of waste you add until you are familiar with the process.
How do I set up my worm bin?
Determine how many pounds of garbage you plan to dispose of in this manner.
Calculate the amount of worms needed.
Calculate the amount of surface space needed.
Secure a container of the proper size, either purchased or built.
Collect newspapers to shred, and a gallon jug to measure water. Example:
For a 2′ x 3′ x 1′ box, from five to eight pounds of newspaper is recommended. After weighing out the proper amount, begin shredding the paper into 1″ strips; crumple it up to prevent matting. Multiply the weight of the paper by three to determine the amount of water needed. (A gallon of water weighs approximately eight pounds.)
Mix the shredded paper and water thoroughly. It is very important that all of the paper be wet. If there are puddles of water remaining in the bottom of the container, pour them out or add more paper. Also mix in one to two cups of soil to supply grit for the worms.
When the worm bin is set up, open the container of worms and dump them on top. Spread any clumps of worms over the surface. The worms will start moving into the bedding to avoid the light. Leave the lid off and the light on; after about an hour remove any worms that have not made their way down into the bedding; these worms are probably not going to make it. It is now ready to add the food scraps.
Adding kitchen waste…
A good method is to divide the box into twelve imaginary squares. Rotate through the squares as you add material to avoid burying stuff in the same place too soon. Try not to “overload” the system.